

QUICK GUIDES
Open all
Close all
CUSTOMER-SUPPLIED MATERIAL
We can also machine your own material, semi-finished or finished parts. For these orders, you can work in Front Panel Designer as normal. Find out what you need to keep in mind when designing a panel in the software using custom material and requirements about the type of material here.
Process
Source Materials
- We can machine all the materials listed under Material.
- We cannot machine steel and elastomers.
- Please get in touch if you cannot precisely categorize your material, we’ll be happy to test out machining it for you.
Clamping and Machinability
- PanelsThe same geometrical restrictions that our own materials have apply to customer supplied materials as well (see the relevant tables in Online Help, e.g., for Aluminum and Brass).
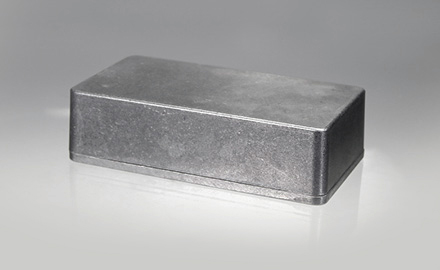
- Semi-finished and Finished PartsWe can machine uniquely shaped panels, provided our CNC machines can handle their geometry. If the material you are supplying is an already constructed box or enclosure, we can only mill on the exterior sides. Designs need to be made accordingly and cannot have backside milling.Clamping requirements and machinability can be confirmed by our team with a technical drawing or sample. Please send your inquiry, including technical drawings, to Info@frontpanelexpress.com.
How to use Front Panel Designer
- Select the ‘Use customer provided material’ checkbox in the ‘Front panel properties’ menu box.Please note: If this checkbox is selected, we will wait for you to provide your material before beginning production. If the checkbox is unchecked, your order would automatically be processed using the selected panel material.
- Please describe your custom material in the ‘Remarks for production’ field in the ‘Front panel properties’ menu box, regardless of whether or not it is included in the dropdown list for the material.
- If the thickness of your material varies from area to area, use the thickest section of your panel as the measurement for the material thickness. This will ensure that cut-outs and through holes are properly milled during production.
- Your design only needs to include elements that you wish to be produced. Elements that are already present on your material do not need to be included in the .fpd file. However, if you wish to include them for design purposes, these elements need to have the “do not produce object” box check in the element's properties menu.
- The external dimensions of the FPD file and the supplied material must be identical. (For non-rectangular panels, this applies to the enclosing rectangle.)
The Process for Supplying Your Own Material:
- So we know how to orientate your material with the design in our machine, please mark the bottom left corner of the material you supply (e.g. masking tape or an easily removable sticker). In the event the dimensions of your panel or the zero point deviate from the .fpd file, please indicate so on the material or let us know via email.
- You can send the material to us by mail (FedEx, UPS,etc.) Please include the order reference number (we send this you you via email after you place your order) on your delivery note to help our shop coordinate your material with your order.
- As soon as we receive your material, we will send you the order confirmation and start production.
Customer-supplied material that still has to be cut by us (‘customer blank’):
If the material you supply is not the same dimension/shape as the end product, please follow these instructions:
- In this case, DO NOT select the ‘Use customer provided material’ checkbox.
- Depending on whether or not thel material is included in the material selection available in Front Panel Designer, select the right material or leave default settings as they are.
- Indicate in the ‘Remarks for production’ field any information about your material and that you are supplying it yourself. Material costs are indicated in the price calculation in Front Panel Designer, but will not be included in the quote.
- Important: To ensure your panel can be clamped into our machines, the blank must be at least 30 mm larger than the final panel in the x and y directions.
EDGE MILLING
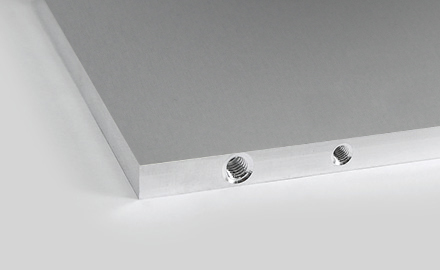
We can also machine the edges of your front panel. Use this option to position tapped blind holes and other milled elements on the edges of the panel.
Process
Edge Milling Files
- Create an additional file for each side edge to be milled, containing a top view of the face concerned. For the width and height, enter the actual dimensions of the edge face. Leave the standard settings for the material. For the thickness, simply select the largest possible material thickness (10 mm).Important: Select the ‘Customer-supplied material’ checkbox to prevent material costs being included again in the price calculation for the side edge file. Please indicate which edge face is concerned in the ‘Remarks for production’ field. For example: ‘Right edge face of file XXXX’.
- Position the elements you would like on the front panel.Tip for the orientation of the edge mill file: Label the sides of your panel with engravings that have been set to 'do not produce'. For example, if the bottom edge of the panel will be milled, label the side that is connected to the front of the panel, as well as top/bottom and left/right as applicable. To avoid misunderstandings, you may also want to attach a sketch to your order.
Geometric Constraints
There should be at least 1 mm of material left around a blind hole. For example, to produce M2 tapped blind holes, the main panel should be at least 4 mm thick to guarantee shape integrity.
Please remember that no drill holes can be made near the corner radii.
EDGE SANDING
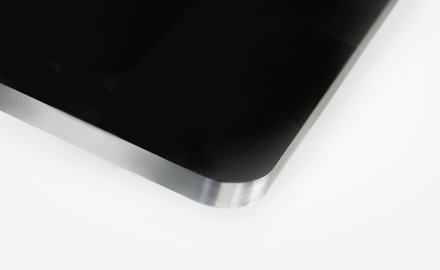
After production, the outer edges (end faces/sides) of the panel may have traces of machining e.g., milling marks. For customers requiring their edges to be aesthetically pleasing, we offer the service of sanding the edges of your panel. As a result, all traces of machining are eradicated and the edge appears matte (similar to natural anodized).
Process
- Rectangular PanelsIn the ‘Front panel properties’ window (Ctrl + F), select the ‘Edge sanding’ checkbox. The cost will be shown in the price calculation in Front Panel Designer.
- Elliptical Panels or Panels with DXF Outer ContourIn the ‘Remarks for production’ field of the ‘Front panel properties’ window (Ctrl + F), enter the text ‘Edge sanding’. As the costs depend upon the work involved and are determined separately by us, the price calculation in Front Panel Designer remains incomplete. The cost will be indicated on request or in the quote/order confirmation.
PROCUREMENT SERVICES
If you would like a powder coating or engraving color not listed in Front Panel Designer, just let us known in your front panel file.
Process
- Powder coating: Select ‘Powder-coated aluminium’ as the material. Select any color as the color. Then write the color you would like and any gloss level and structure in the ‘Remarks for production’ field.
- In-fill Color: Select any color as the engraving color (in the properties window of the respect engraving element). Please explain in the ‘Remarks for production’ field (in the properties window for the panel) which color is to be ordered and used for which engraving.
The price calculation in Front Panel Designer remains incomplete in this case. The cost for the material and for procuring it will be indicated on request or in the quote/order confirmation. Procurement costs can also be found under Prices & Services.
SERIAL NUMBERS
Using the text engraving feature in Front Panel Designer, you can also mark a series of panels with consecutive serial numbers.
Process
- Add the first serial number as a text engraving to the front panel in the relevant place.Please Note: If the serial number is to be printed rather than engraved, select the ‘Always print this element’ option in the Text Engraving menu box under ‘Print/In-fill’.
- In the ‘Remarks for production’ field of the ‘Front panel properties’ menu box (Ctrl + F), enter the text ‘Please produce with serial number from ... to ...’
Non-Produced Elements & Object IDs
In Front Panel Designer you can position non-produced elements and assign object IDs. For example, you can use these functions to add comments, markings or information about assembly elements; to show outlines of adjacent parts; to position guide lines; for documentation purposes; or to provide an overview of a number of milled elements.
Process
To indicate that an element is a non-produced element, simply use the named elements (milled objects, engraving elements, graphic files) and select the ‘Do not produce object’ checkbox in the respective properties menu box. The elements in question are shown in blue in the drawing and are not included in production or in the price calculation.
To assign an object ID to an element, highlight the element on the front panel and enter the corresponding text in the ‘Object ID’ field in the ‘Element properties’ area (if this is not displayed: View > Element properties). The object ID is used particularly in the Scripting to clearly identify elements.
Please use these options primarily for your own design purposes. For notes that are directed to our production team, please write in the "Note for the production" field.